Saturday, August 27, 2011
Module construction
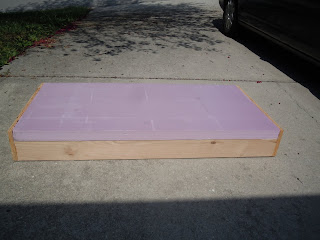
We've (kids+me) made two 2' x 4' frames (well, 2' x 4' 1.5" frames). We used the Free-mo N suggestions: 6" high by 24" wide 3/4" birch plywood end pieces, then the same plywood but 4' long by 4" wide for the side boards (thus the overall 4' 1.5" length: we could use two 2' x 4' plywood boards and minimize cuts). Glued and screwed (using a Kreg jig) the frames together. Before this assembly, clamped the two endplates that would touch together, then drilled two holes, each of one inch diameter, on either side of the midpoint so that wired could pass between (Free-mo N doesn't do this, and instead runs wire under module ends). To help alignment between the two sections, each has two 5 mm diameter metal pegs that fit into complementary holes in the other module. Many of the deviations from Free-mo suggestions come because I want to be able to slide the modules together on a table or shelf and so there won't always be room for attaching a C-clamp (though the modules are made so this is possible). Each module also has eight felt feet underneath so they can be put on various surfaces without damaging them (you can see them in the photos elevating the module above the driveway). I have also attached the pink foam for the surface (attached using Liquid Nails for Projects, though they're a flush fit to the end pieces).
Overall, this is coming out neater and stronger than I expected. The one thing I've noticed is that I find a 2' x 4' module awkward to carry if it is to be kept level: reaching under to hold the opposite side doesn't feel secure, nor does grabbing the end pieces. I'm sure with practice it will be better.
Subscribe to:
Post Comments (Atom)


No comments:
Post a Comment